 Here’s a nice shot of the roof of the house taken from about 50 foot up, which we can zoom in on and see how the sedum is doing. It’s been up for about 6 months now and with the poor summer we have had with frequent rain we have rarely had to use the irrigation system to help it settle in.
Oct
10
2008
Sedum roof inspection on the log house
Published by in Sedum Roofing
Oct
7
2008
Balcony beam end plates and foaming
Published by in Log House Design
 To make sure no moisture can get past the steels where they stick out of the house, we have cut back into the logs and put plenty of silicon around, before fitting these ply end plates.
 These were given two coats of yatch varnish before installation and then sealed again with silicon. Then from the back we put closed cell can foam to fill up the hole in the log.
 We had to make sure that it filled around the steel beam everywhere to avoid any pockets where moisture could build up.
 Then a few days after that we filled from the top so that the first two feet of steel inside the house lives in a bed of foam. We hope this will do the trick.
Oct
5
2008
Balcony steelwork on the log house
Published by in Log House Design
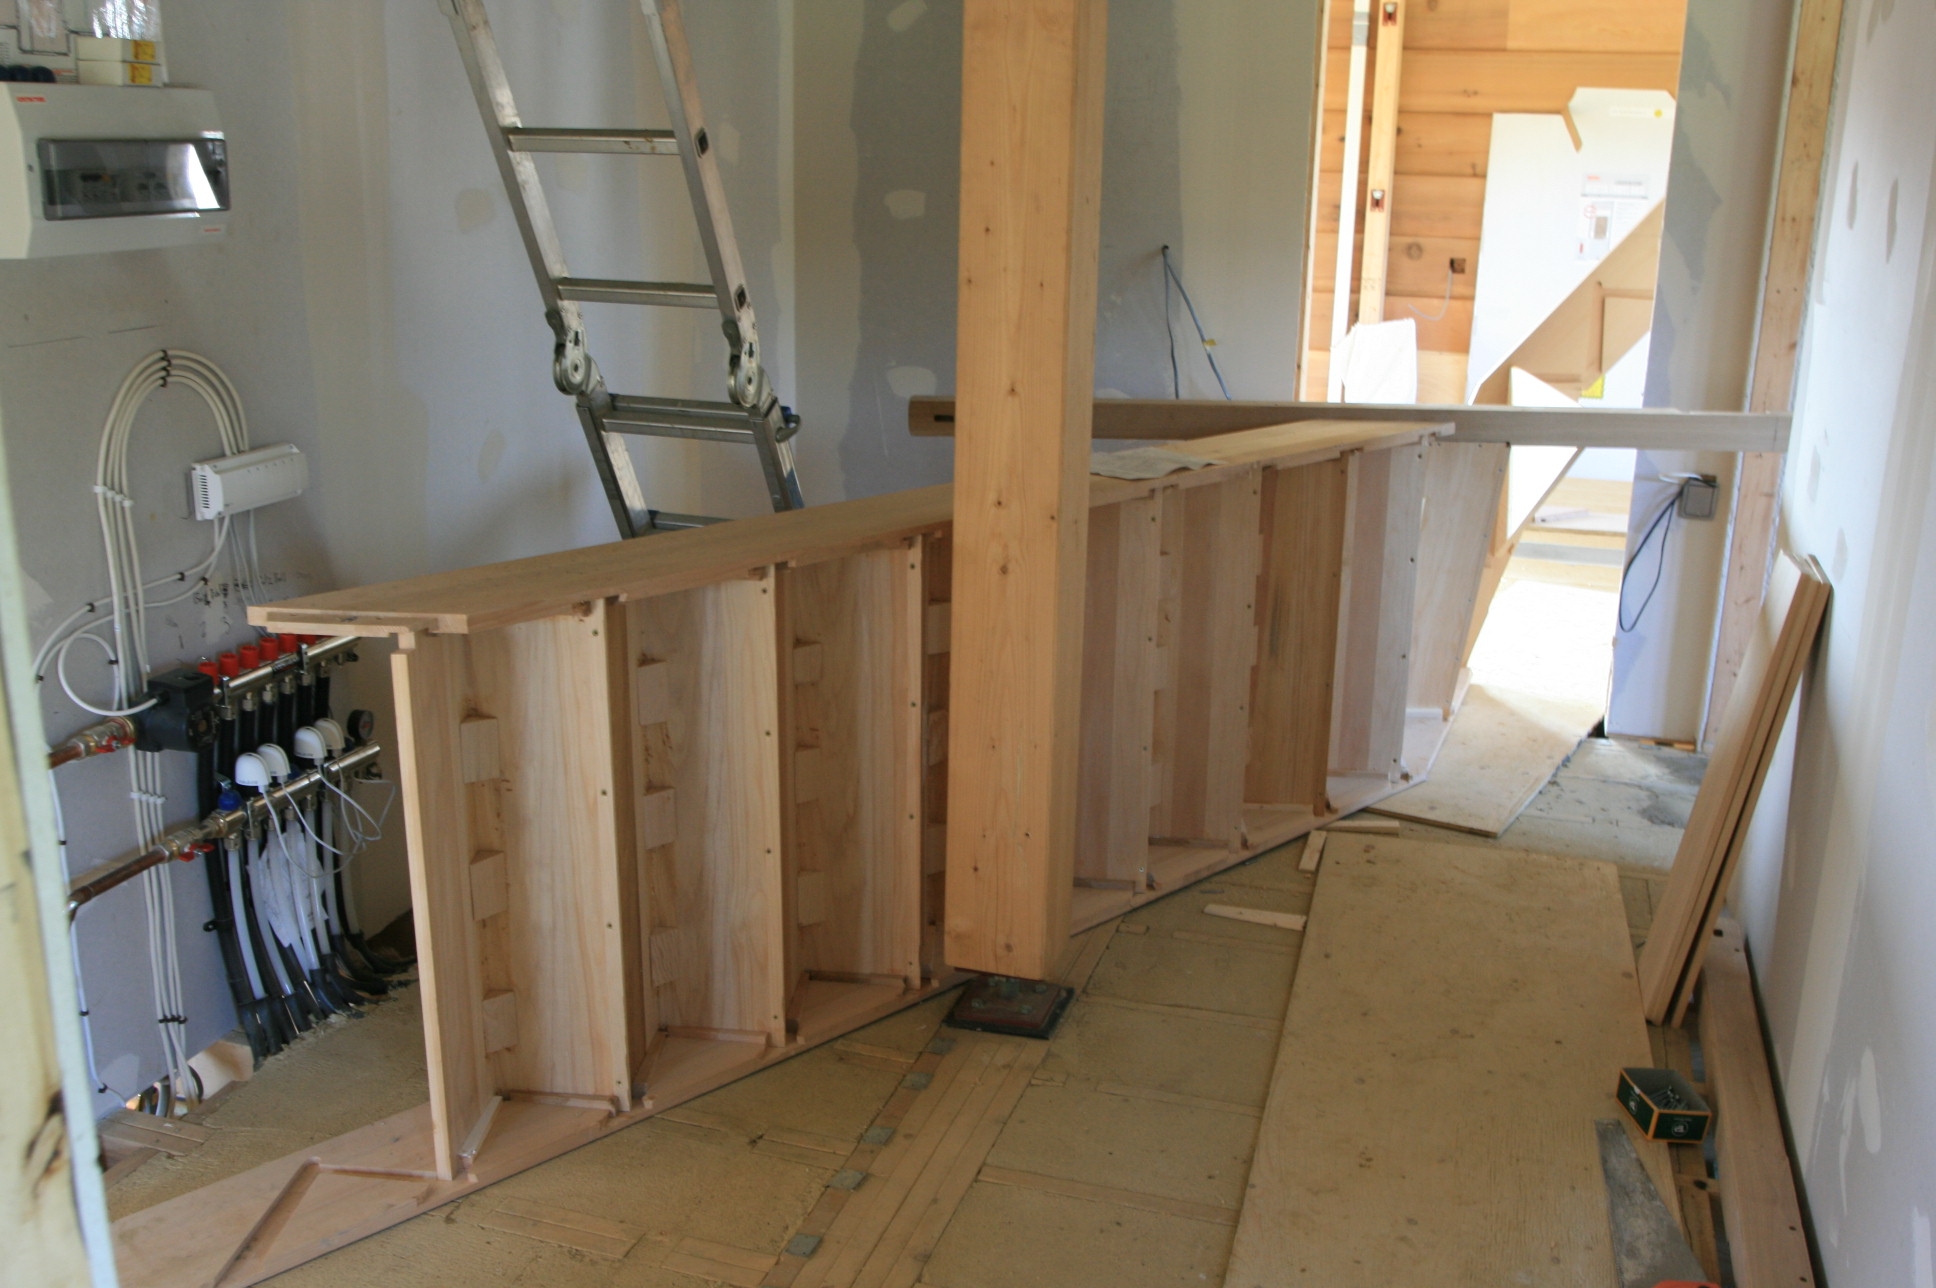
Against the advice of the North American log house suppliers, we decided to make the balconies for the three bedrooms with steel, rather than wood supports.
 We were strongly warned that this would result in condensation in the house which would seep into the ceilings etc. With the underfloor heating which goes over the steels we don’t think this will be a problem but we have done a lot of work to make sure no water can get in.
The steels coming through the log wall are 152 x 152mm “I” section or 6″ square in old money. They were pre drilled for the fixings that will be needed for the Western Red Cedar that will go on the top and for the underside, and then sent off for galvanising.
Once they came back, 6″ square holes were cut out through the logs and then the steels slid into position. Then everything was measured up so that the sub frames shown above could be made and fitted.
Oct
1
2008
Underfloor heating pug repairs
Published by in Ground Source Heat Pump
The underfloor heating pugging had to be put in some time ago, and in some places general foot traffic has cause errossion of the pugging where not enough cement was put in the pug mix. Like any building job, especially a self build, a number of people have been making up the mix, and some were not as accurate as others in estimating their shovel loads of sand and cement. Of course a proper builder will tell you the only correct way to get the amounts right is to use a gauge or batch box!
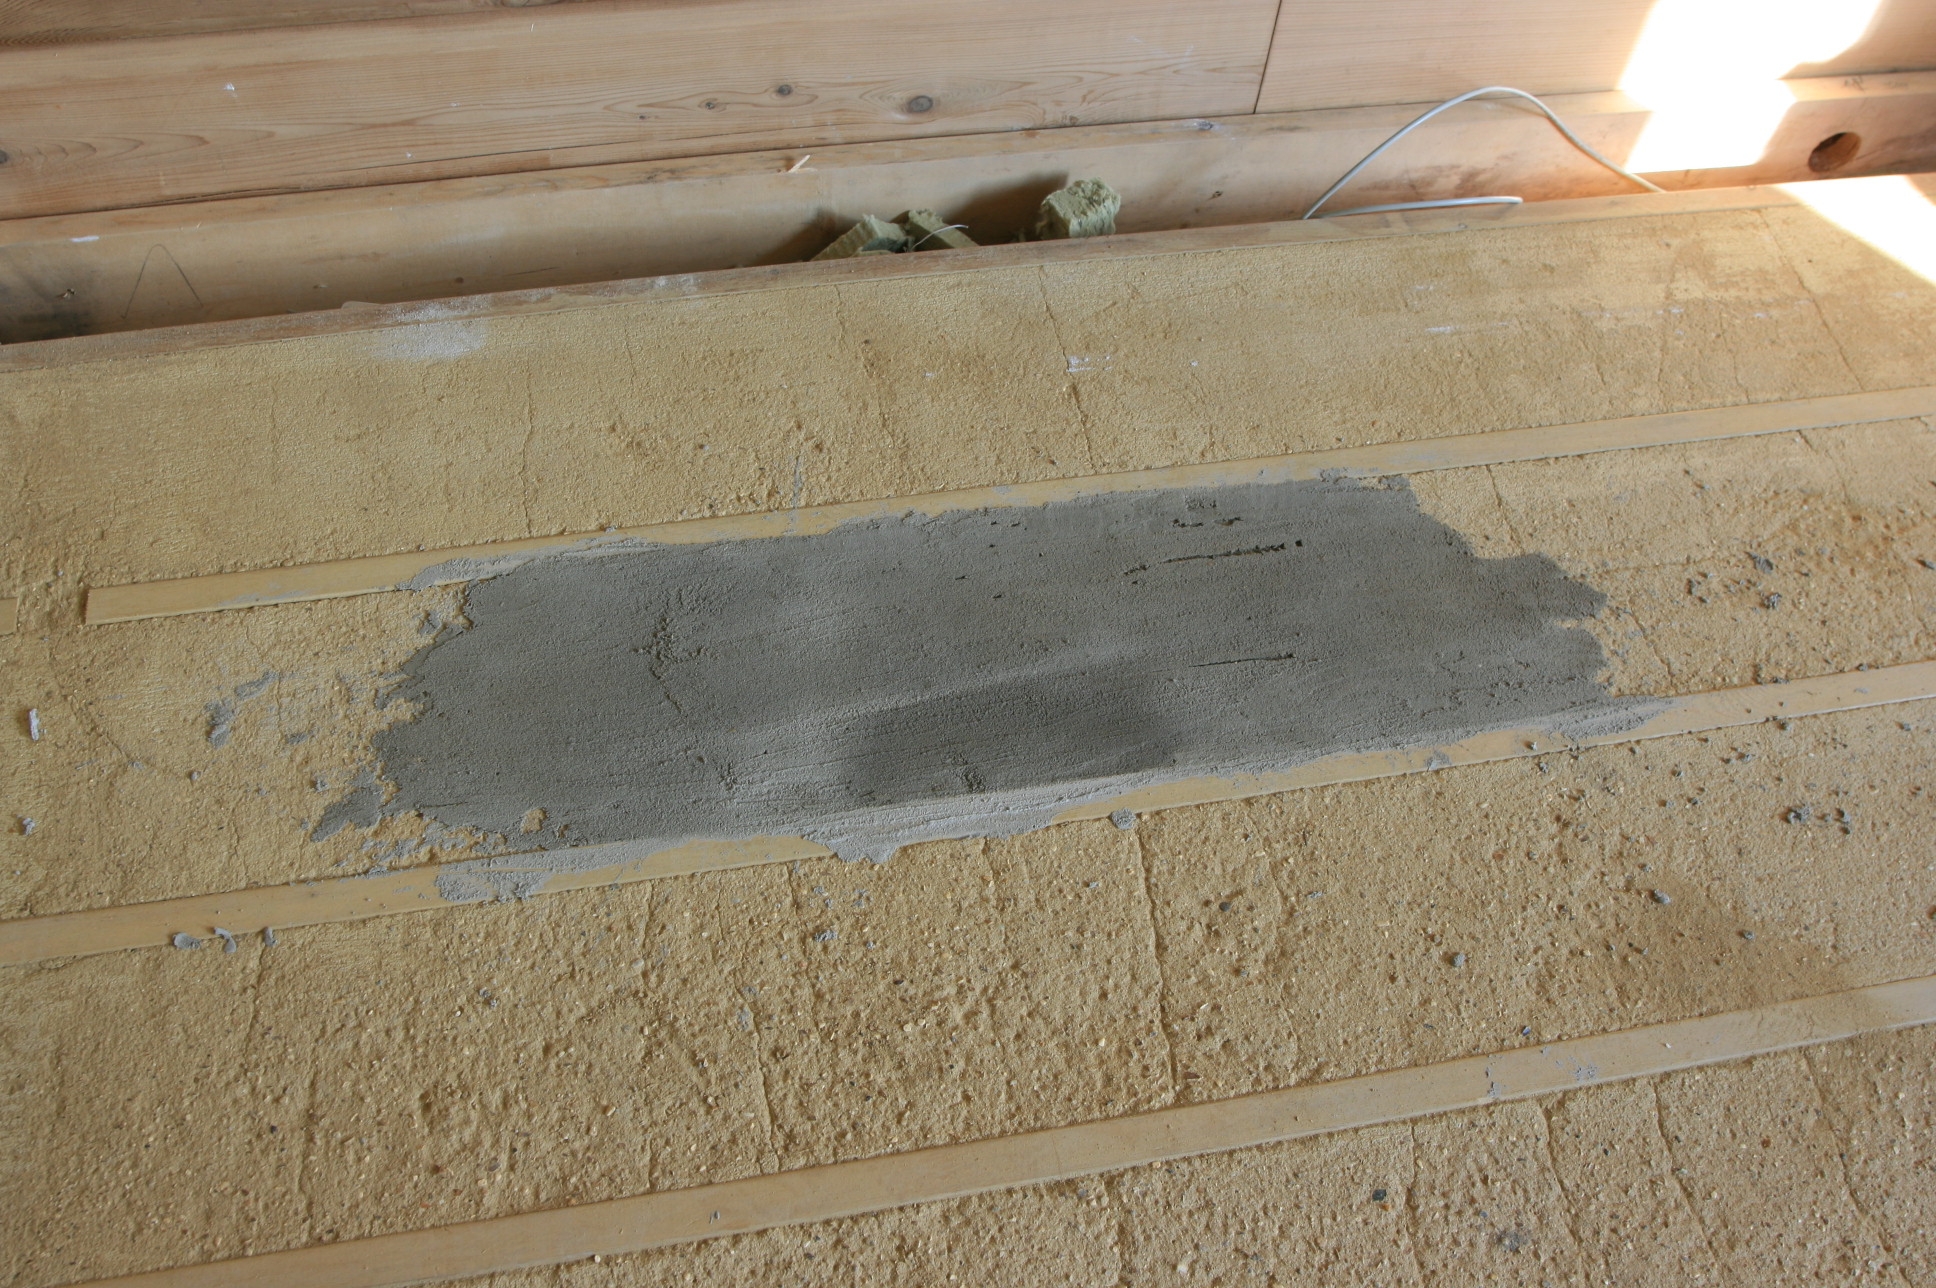 So we have had some repair work to do, and we have used some Unibond to help the repair work adhere to the material below and to strenghten the bits where cement is a bit under spec.
Sep
30
2008
Underfloor heating setting up
Published by in Ground Source Heat Pump
 In order to run the heat pump and start to slowly dry out the house, we needed to make sure the manifolds were connected for the underfloor heating and would operate correctly. On the ground floor the underfloor system runs “open” without any room stats. Upstairs each bedroom has a room stat which sends it’s signal to an actuator on the valve for it’s “loop”.
 The actuators are the little white hoods you can see on the manifold. So the room stats have been put in place temporarily while the pump is run and set at a low level for a week or so to start the drying out of the house.
Sep
29
2008
Towel Radiators and Ground Source Heat Pumps
Published by in Ground Source Heat Pump
 Because a ground source heat pump output is best run at a lower temperature than a conventional boiler and radiator system, if you want to run a towel radiator, this is run off the primary circuit of the heat pump. To make sure everything works ok, it seemed sensible to make sure these were in place for the commissioning engineer so that they could be tested too.
Sep
28
2008
Ground Source Heat Pump commisioning
Published by in Ground Source Heat Pump
 Tomorrow the engineer comes to commission the ground sourced heat pump. We have carefully gone through the Ice Energy check list to make sure we have done everything we are supposed to. Eight cans of glycol arrived on Thursday ready for the commissioning as the ground loops will need filling with the glycol to do their stuff.
 We have to instal an exterior thermostat on the outside of the house on a “sheltered north facing wall” and this internal thermostat so that the system can compare the two and adjust the heating accordingly.
Sep
26
2008
Putting in the stair case in the log house
Published by in Log House Construction
 With most of the plasterboarding done we can now put the stairs in. These have been ready at the joinery suppliers for some weeks now. So soon, no more ladders up and down but stairs!
Sep
20
2008
A laundry chute for the log house
Published by in General
 As the utility room is adjacent to the stairs from the bedrooms, we have cut a hole in the ceiling so that laundry can be dropped down without having to go down the stairs. It will land in a cupboard near the washing machine. We have to make sure that we do not enable a fire path by making sure we use a thick wooden flap for the door at the top of the chute. We will take an idea from the vacuum system and make sure the smallest part of the chute is the bit where you put things in so that if items of clothing get past that point then they will make it through. As the total length of the chute is only 18 inches, it should not be a problem.
Sep
13
2008
Log House protection system clean up.
Published by in Log House Construction
 A few sunny days so time to finish the outside protection of the logs. The log suppliers from North America sent waterbase undercoat and top coat. Where the undercoat had been applied but the top coat had not been applied, strange “streaks” or “runs” at the bottom of logs appeared. Sanding out was not an option as it not only would leave lighter spots but also would not get the staining out of the grain without severe sanding.
However using a used household scourer and some water does the trick a treat and is very quick too!